What a wonderful weekend we had here in my studio… running the Drawing Animals workshop for the first time. To find out when I’m running it again (UK/USA/CANADA) read on…
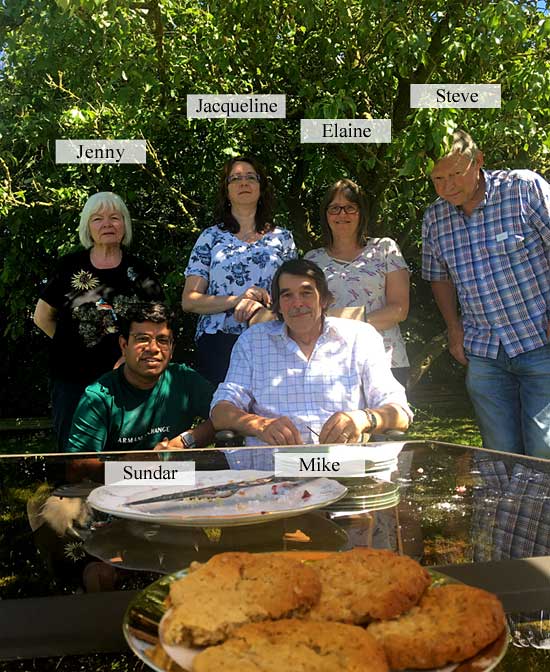
Really lovely company and weather too, and lunch in the garden on both days. All the cake’s gone, but I’ve still got cookies for supper! 🙂
June 2018 DRAWING ANIMALS workshop
I’ll be running this workshop in my studio again in October (20-21) and, as a 3-day workshop, in:
OTTAWA, ON – August 17-19 Limited places now available
and
CLEARWATER, FL – August 24-26 Only ONE seat remaining!
I won’t bore you to tears with acres of explanation, I’ll let the images tell the story – except to say… the new studio is FINISHED! Well, all except a few minor jobs.
One vital job, that I forgot to mention earlier, was that our fields are easily waterlogged and our buildings have no drains to accept water from their roofs. That was then – but now we have had the drainage boys in!
They laid a 6″ drain the full length of the field, ran off a spur to connect to four more spurs that drain the worst areas, AND the main drain continues behind all of the buildings to collect the roof run-off! In the meantime I spent a week moving a mountain of sand to fill in the old duck pond (no ducks, no geese, so no need for the pond).
Filling the duck pond and the drainage is underwayThe new studio sits at the back of the yard as viewed from our laneThe furniture restored and paintedThe laying of the carpet tiles is almost complete - at 1:20 am!The new chairs have arrived......and the sturdy tables. My 1.0 x 1.2 metre A0 drawing board is installed
Almost finished now. My massively heavy drawing board was dismantled, dragged from the old studio (Heck, was I feeling my age!) and reassembled. It can be moved but it’s not something you’d want to do often!
Artograph DB300 graphics projector
My 30 year-old faithful Artograph was moved into the new studio. I don’t use it often these days but sometimes it’s invaluable.
Set up and ready to teach!
And finally, all I need is workshop attendees – which we had (a full house!)… except that I was so engrossed in teaching I forgot to take any photos! 🙁
Oh well! Next time I WILL take photos! And you haven’t long to wait because we’re holding another Weekend Workshop on October 1st and 2nd. It’s already 50% booked so if you want to join us (and be royally fed by Jenny!) head over to my website for the full details: www.SibleyFineArt.com/_workshop_uk_yorks.htm
Thanks for following the progress over the past year, and for all your good wishes along the way – I really do appreciate them.
I had every intention of keeping you up to date on progress but the progress took so much time there wasn’t any to spare. Sorry! Well, today we emptied three B&Qs of carpet tiles – and we had to change plans half way through due to a shortage and settled on two colours instead of one.
Having returned from the Maidstone 3-day workshop on Monday, tomorrow the final work begins in earnest. It has to! We’re holding our first 2-day workshop here on September 17/18. Incidentally, it’s fully booked, so we’re running another two weeks later on October 1/2, and even that’s filling – just six places currently available.
OK, back to the studio…
The walls and ceiling are lined with plywood. I would have preferred plasterboard but the builder persuaded me that the wooden building would move and plywood would be a better choice. I’m still not convinced – especially after hours of filling and levelling all the joints. They’ll never be perfect but at least they look a lot flatter.
That job done, the paper hanging began with heavy weight liner paper. Now, I hate papering ceilings – and this one is 20′ by 22′! There’s nothing more likely to frustrate than trying to handle a 22 foot long piece of gooey paper above your head and paste it accurately.
I actually enjoy hanging paper – vertical paper! – and it took only three days to complete the four walls. By then I also had the skirting boards and architraves in place and gloss painted.
So, what are the two donkeys doing in the centre of the room? An extra and unexpected job 🙂 Jenny was raising funds for “Walk with Donkeys” in Crete and needed a collection box. The two donkeys have now been completed and fixed either side of a central box.
Donkey Charity Collection Box
Back in the studio, the ceiling received three coats of paint and I was ably assisted by my good friend Chris Howlett, who had come up from Cambridge to help. While staying in US hotels I had noticed the wall coverings and set out to find the same in the UK. If they’re good enough to take the punishment meted out in hotel rooms, I knew they’d suit me too. I finally found a source of commercial vinyl “extra scrubbable” wallpaper in a warm off-white – and 56″ wide! That really speeded the job up… until disaster struck!
The wallpaper paste soaked through the lining paper and “blew” the plaster that was smoothing the bad joint between two of the wall boards – where it mattered on the main wall I’ve earmarked for filming DVDs. We tried a couple of fixes but eventually realised that only complete renewal would suffice.
Eventually, I managed to turn back the edge of the vinyl paper, removed a section of lining paper, and re-plastered the entire joint. Finally, I succeeded in inlaying a new section of lining paper and left it for two days to dry throughly. With a lot of trepidation I set about hanging the next section of wide vinyl, knowing that I only had an inch of overlap to trim to a accurate joint. I should have mentioned that this commercial paper is not butt jointed, instead it has two selvedge and you overlap adjacent sheets by 2″. Then you cut through both sheets with a knife and smooth the cut edges together. It can (honestly!) give an almost undetectable join – when it’s done by a professional 🙂 Fortunately, the joint went well and the last wall was quickly completed.
As if I didn’t have enough to do, Pete Hogg arrived to begin work on the nearby toilet, which is good – except that I have the door frame and door to fit and install all the electrics. And all Pete has to do is convert a 100+ year-old former earth closet into a state-of-the-art restroom! He’s doing an absolutely splendid job and, as I write, should have installed the hand basin and water heater, and completed the floor tiling, tomorrow.
Pete Hogg happily working on the 'luxury restroom'
In the meantime, I’ve completed the electrics and installed the lighting. And I’m furiously completing the plan chest work table, painting the print rack, dresser and associated shelves, and this morning I installed the outdoor half of the HVAC air conditioning system. The chairs have been delivered, we have one table and will order the remainder on Monday, and… it looks as though we will be ready for the inaugural workshop 🙂
Tomorrow I’ll begin work on the interior half of the air conditioning, in between adding coats of paint to the furniture. More updates as soon as I have time… if any can be found!
With only a little over a month before we leave the UK to fly to the US there are still places available in the SAN ANTONIO, TX, and LOS ANGELES, CA, workshops. And, incidentally, in the Yellowstone 6-day workshop too.
The San Antonio and LA workshops are both 3-day, Friday to Sunday events:
San Antonio
June 3rd to 5th – Full workshop details
I fervently believe drawing should be FUN! So we run friendly and informal workshops, designed for artists of all abilities. If you have a desire to take your drawing to a new level of realism, these workshops were designed for you!
Over the three days I’ll show you how you can break down any drawing, however complex, into easily manageable parts, and apply simple step-by-step techniques to draw them believably.
You’ll travel from the basics right through to a final drawing, covering a variety of techniques along the way. And no lectures! I prefer to work with you individually as you draw.
All you need do is bring yourself – all paper, pencils and other necessary supplies are included in the cost. And on my website you’ll find lists of local accommodation, travel assistance, Things To Do in the area, and information on the venue itself.
Complete the simple Mailing List box and you’ll receive the Workshop Newsletter to keep you up to date with developments, and I’ll personally warn you when places are beginning to be scarce.
I hope you decide to join us – my wife Jenny and I will love to meet and work with you.
We fancied doing something SPECIAL as a workshop in 2011. Jacksons Hole was mentioned but the cost was prohibitive and then the idea slowly dawned… let’s go back to YELLOWSTONE! But this time, instead of a 5-day workshop, let’s make it six days, make it affordable, and include everything in the price – that’s:
Illustrated talk by a Park Ranger so we know what to expect and look out for during our visit to…
A full day in the Park with assistance on photography, taking that unusual but useful shot, and looking for elements that can be combined into a useful setting. And we provide transport and lunch.
Improve your photography – late afternoon sessions by talented Artist and Photographer Rich Adams beginning with the basic uses of compact cameras.
Visits to the nearby Grizzly & Wolf Discovery Center to get those photographs that eluded you in the Park.
Five days of uninterrupted drawing covering drawing from the basics up to advanced.
AND all tools and paper will be provided. Just bring yourself.
YELLOWSTONE USA 6-day SPECIAL WORKSHOP
Dates : 12th -17th June 2011
Duration : 6 days, 10 am to 5 pm
Location : Holiday Inn, West Yellowstone, Montana
Our busy 2008 Yellowstone 5-day workshop
Novice or advanced, you’ll travel from the basics right through to a final drawing, covering a variety of techniques along the way, including the use of references and how to use them for composition, how to use Negative Drawing effectively, and the benefits of seeing and using Negative Space. And no lectures! I prefer to work with you individually so you can learn and explore by drawing.
And I’ll show you how you can break down any drawing, however complex, into easily manageable parts, and apply simple step-by-step techniques to draw them believably.
You’ll learn both the “HOW” and the more important “WHY” – the one that adds understanding to the other. Whatever your present ability, you will leave with a new-found knowledge of how to draw effectively, and how to remove stress from your drawing projects.
WORKSHOP DETAILS
We’re doing everything we can to make this special workshop affordable – including reserving rooms in two hotels to give you a cheaper option. And we scouted for local RV and campsites as well as B&Bs. They’re all listed on my website.
Let’s make this a workshop to remember! Or, as Rich said, something to tell your grandchildren about 🙂