Laurene emailed me from Canada to ask about printing and the problems she’s encountered:
This year I’d like to try offering a few limited edition prints on my website and I’m quickly learning that printing is an art form in itself!
Printing is not so much an art as a frustration! It involves… compromise 🙂 When I first went into print I couldn’t understand why printers kept saying “Well, this is as close as we can get to the original.” My mind kept saying “Why are they happy with ‘close’? Shouldn’t they be looking for ways to improve the printing process?” This was in the days when offset-litho was the only printing system available.
Later I understood the inherent limitations of printing. Offset-litho uses a pattern of dots, so four adjacent round dots will always possess a white patch in the centre where they meet. That limits blacks to an 80% coverage, resulting in a dark grey and a decrease in contrast. Printing, therefore, is a compromise between what you want it to look like, and what the technology can accomplish.
Now I print in-house using a giclée (pigment-based inkjet) printer that doesn’t have that limitation, and I have full control over the resulting image. Of course, no printed image can be better than the initial scan, but I’ll return to that.
The prints will be giclée. They’re using a process they call Durachrome that heat-sets the ink after printing with UV light.
With that in mind, I’ll concentrate on digital printing but cover offset-litho too because it might be helpful to other artists.
I have a good local printer who can scan my drawings on a large scanner that can accommodate my drawings so they don’t have to be patched together in Photoshop. It’s a flatbed scanner not a drum scanner but it does a very good job.
With the exception of the Cruse flat-bed scanner I still believe that a laser drum scanner will produce the best results (see “The Best Scanners for Artwork”). It’s always my #1 choice, but if you’re happy with your Printer’s result, that’s OK.
I’ve tried 3 different papers so far. I like the results on Arches watercolour paper, hot press, and on Canson Infinity printmaking rag paper (museum quality). The problem is that both of these papers are not quite as white as Mellotex (even though they’re sold are “pure white”) and the print has a sepia tone to it. Is this a problem you’ve had before Mike?
I’ve experienced that problem but I’ll cover the paper choice first: I think there are two schools of thought – those that believe the name will help sell the print, and those (me!) who think the result is more important than the paper’s trade name.
Arches and Canson are excellent and well-respected papers, but are they as smooth as Mellotex? If they aren’t, you’ll encourage ink bleed or introduce an unintended distracting texture (both generating a softening effect), and your print will not reflect the quality of your original.
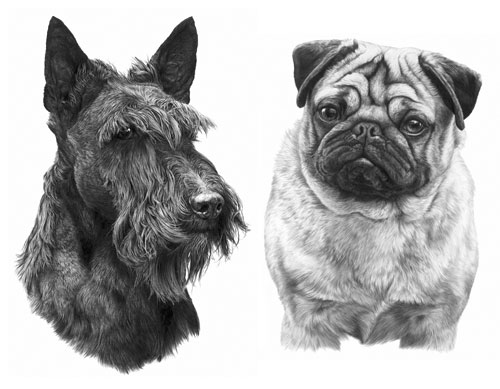
When I first began drawing dogs for print I drew on plate-finish Ivorex, which was also available commercially as a printer’s paper – job done! Ivorex morphed into Mellotex, and Mellotex was exclusively available as an archival quality printing paper. Now that Mellotex is deceased, we have Conqueror Diamond White – also an acid-free, archival, plate-finish paper for the printing industry… so it would be an ideal choice for offset-litho printing.
However, for giclée printing you need to use an appropriately coated paper. To avoid the ink bleed I mentioned – where the ink soaks into the paper and spreads so it blurs edges – giclée papers have an impermeable coating usually termed the “ink receiving layer”. Finding a bright white paper, in my experience, is not easy. In fact I’ve yet to find my ideal paper.
I’ve tried Hahnemühle Photo Rag with reasonable results, but it’s not as smooth as it appears to be and it’s not as bright white as Mellotex or Conqueror Diamond White, but it’s probably worth trying. You’ll find the
Data Sheet here.
You might also try Hahnemühle FineArt Baryta 325gsm, which wasn’t available when I was using Photo Rag. It claims to be bright white and to generate high contrast. Or there’s a Photo Rag Baryta if you prefer cotton over wood-fibre papers.
Again, not one I’ve used: Hahnemühle Photo Rag Ultra Smooth 305gsm (very smooth matt finish). It’s mould-made, 100% cotton, pH neutral, has an extra smooth surface, and has a brighter white point than Photo Rag. Here’s the Data Sheet.
It appears to be very close to what you need, but being mould-made it’s not going to be as smooth as the plate-finish Mellotex or Conqueror. However, it might give a visually perfect result – not exactly the same as your original but presenting its best qualities. Personally, I aim at producing a pleasing and saleable print rather than trying to faithfully reproduce every aspect of the original drawing. You have to bear in mind that only you, and not your potential purchasers, have seen the original drawing.
There’s also an alternative approach I recently stumbled upon – applying an inkjet receiving coating to non-inkjet paper – and, as you’re in Canada, it’s Ontario based!
inkAID™
Manufactured by Ontario Speciality Coatings, inkAID liquid inkjet receptive coatings are hand-applied to any type of paper, as well as metals, fabrics, wood-veneers, canvas and more. The coatings are pH neutral, acid free and are specially-designed to work with dye and pigment inks. Shelf life is a year from the date of purchase.
Because the bleed of inkjet printing on uncoated paper reduces contrast and sharpness, the results are usually unacceptable. Coating paper with an inkjet receiving layer solves the problem. That means you could use Conqueror Diamond White as a giclée printing paper by adding a coating. Source: The-Artisan-approach-to-Inkjet-Printing and inkAid1.com
Would you know if there’s a special print instruction that I could give the printer so that the prints look more graphite? If I print the scan on my home printer on bright white paper, there is no sepia tint at all, but if I push the saturation in Paintshop Pro I can see the natural warmth of graphite, meaning that it’s not a cool grey.
I suspect I know what’s happening… it’s a result of using 4-colour CMYK printing. When I changed my Printer, the new company experimented with 4-colour printing, believing they would reproduce finer detail. As a result, I have one print with an overall pale blue colour-cast and another with a sepia cast. Nothing we tried could solve that problem.
Later, using a commercial digital printing business, I had the same problem with giclée prints – until Epson introduced the K3 ink system. Instead of mixing colours to obtain greys, this system uses a black and two grey cartridges. Switch the colours off and colour-casts are banished! My Epson R2300 uses this system (choose the “advanced B&W photo” option).
Previously, with offset-litho printing we used Duotone printing. That uses two or the four 4-colour plates: we used black ink for one and a warm grey for the other. The result was excellent, within the bounds of offset limitations. We also tried mixing a “grey” that was a brownish purple. That worked even better! It’s my understanding that graphite draws with a black mark but the clay mixed with it introduces a brown tint, which is what the brown/purple mimicked.
When I’m printing giclée prints in-house I always reduce my images to greyscale. That, and opting to print using only blacks and greys, guarantees there cannot be a colour-cast present.
This is just an idea and untested, but… if you are using giclée printing and want to introduce a controllable degree of sepia tint, in Photoshop I suggest you try:
- desaturating the image (not greyscale, you need to maintain it as an RGB file)
- copy it to a new higher layer
- sepia tint the copy
- set the copy’s opacity to 10%
Now experiment with the opacity until you achieve a grey print with a touch of warmth from the sepia overlay. That should give you the ultimate in control over the appearance.
I’d like the prints to look as close as possible to my original drawings but I’m stumped at the moment. The printer who produced the Ducks Unlimited prints last year did a great job but his press is meant for large volume runs. A run of 10 would be cost prohibitive.
Were the Ducks Unlimited prints offset-litho? I’m assuming they were. The greatest proportion of the charge for an offset press is for the machine set-up time; in comparison, the cost of materials and running time are almost negligible. So short print runs are always very expensive per print.
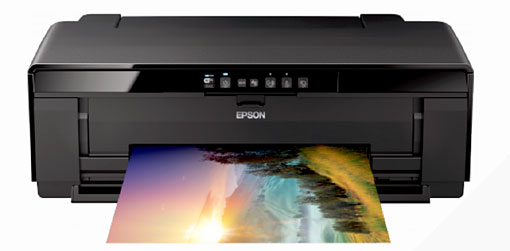
A short run of 10 prints really needs to be giclée printed in-house to be financially viable. I have an Epson R2300 that cost in the region of £500 (about $800 CAD). That was over ten years ago but it paid for itself with the first 20 prints produced. Prices haven’t altered much – the Epson SureColor SC-P400 is a similar A3+ 8-colour printer that currently costs around £470 ($750 CAD).
Offset-litho is cheaper per print but the entire edition has to be produced in a single run, to avoid repeated additional expensive set-up times.
Giclée printing costs more per print than offset-litho but (using in-house printing) prints can be produced when required; there’s no dead stock or dead money involved. However, there is the initial cost of paper stock, so if your printer can viably produce a run of just 10 prints, it sounds like a good deal. When your prints sell – they will! – then consider changing to in-house printing for the maximum control and financial return.
Finally…
…congratulations on Drawspace being chosen as one of the top 50 online learning sites! I know your Intermediate and especially the Advanced courses changed my approach to art. I overcame my hesitancy with regard to composition and I gained confidence in my artwork which encouraged me to show my work more. I’m enjoying myself and I’m trying new things as a result.
I’m so pleased you found the courses helpful. I’m still teaching at Drawspace and still enjoying it immensely! New sessions are starting soon: